2. Quick Start
This quick start page will tell you how to quickly get up and running with a very basic “development mode” Gort service running in a local container, communicating with either Slack or Discord.
The resulting service will be suitable for demo purposes only: do not use it in production!
2.1. Prerequisites
To install the demo version of Gort, you’ll need the following:
Docker (if using
docker compose)
2.2. Create your Configuration File
For more information, see: :doc:`configuration`.
Copy the example configuration file
config.ymltodevelopment.yml.Make the following changes to the
development.ymlfile:Remove (or comment out) the
kubernetessection.If you’re using Slack, remove (or comment out) the
discordsection.If you’re using Discord, remove (or comment out) the
slacksection.
2.3. Create Your Bot User
Whichever chat implementation you use, you’ll first have to create a bot user. Choose the section below that’s appropriate for your preferred chat provider.
IMPORTANT: Both sections below involve the creation of a secret bot token. Please protect this token carefully: if someone steals it, they can make your bot do whatever they want. You don’t want that.
2.3.1. Create a Slack Bot User
If you haven’t done so already, create a new Slack workspace.
Use this link to create a new Slack app: https://api.slack.com/apps?new_app=1. Choose to create your app “From an app manifest”.
Select your workspace and click “Next”.
Copy the contents of the manifest file slackapp.yaml into the code box below “Enter app manifest below”, replacing the existing content. Click “Next”.
Review the summary and click “Create” to create your app.
On the left-hand bar, under “Settings”, click “Basic Information”.
Under “App-Level Tokens”, click “Generate Token and Scopes”.
Enter a name for your token, click “Add Scope” and select “connections:write”. Click “Generate”.
Copy the app token that starts with
xapp-and paste it into theslacksection of yourdevelopment.ymlconfig file asapp_token. Click “Done”.On the left-hand bar, under “Settings”, click “Install App”.
You’ll get a screen that says something like “Gort is requesting permission to access the $NAME Slack workspace”; click “Allow”
At the top of the screen, you should see “OAuth Tokens for Your Workspace” containing a “Bot User OAuth Token” that starts with
xoxb-. Copy that value, and paste it into theslacksection of yourdevelopment.ymlconfig file asbot_token.
2.3.2. Create a Discord Bot User
For a more detailed walk-through, see https://www.writebots.com/discord-bot-token/.
Go to the Discord Developer Portal at https://discordapp.com/developers/applications/. This portal shows all of your applications and bots. Click the “New Application” button.
Follow the prompt to give your bot a name.
(Optional) If you’re feeling creative, add an icon and description for your bot.
On the menu on the left side of the screen, click “Bot”. It’s the icon that looks like a little puzzle piece.
Click the blue “Add Bot” button, and confirm that you do, in fact, want to add your bot.
You should be taken to a page with a green message reading, “A wild bot has appeared!” and a “Token” field. The latter will have and a blue link you can click called “Click to Reveal Token”. Click that link, and copy your bot token to your
development.ymlconfiguration file (specifically thebot_tokenfield in yourdiscordsection).Finally, in order to add your bot to your Discord Server, you’ll need to navigate to the “OAuth2” tab on the left-hand menu.
Once there, scroll down to the “Oauth2 URL Generator” section. In the “Scopes” section, select the
botcheckbox. A URL should appear at the bottom on the window: this will be your URL for adding your bot to a server.Finally, scroll down to the “Bot Permissions” section and click the following checkboxes:
Send MessagesEmbed LinksRead Message History
Scroll up, copy the generated URL, and navigate to it by pasting it into a browser. Select the server to add the bot to, and confirm the selected permissions. If you get an “I’m not a robot” captcha, do what you have to do there (unless you actually are a robot).
You should now have successfully created a Discord Bot Token and added your own bot to a server!
2.4. Build the Gort Image (Optional)
This step requires that Docker be installed on your machine.
If you want to use the most absolutely bleeding-edge version of Gort, you can build your own local Gort image. If you don’t mind using the stable version, you can skip this step and Docker will automatically download it for you.
To build your own local image you can use the make file included in the root of the Gort repository:
make image
You can verify that this was successful by using the docker image ls command:
$ docker image ls
REPOSITORY     TAG       IMAGE ID       CREATED         SIZE
getgort/gort   0.9.0     66fca0b90847   5 seconds ago   109MB
getgort/gort   latest    66fca0b90847   5 seconds ago   109MB
This should indicate the presence of two images (actually, one image tagged twice) named getgort/gort.
## Starting Containerized Gort
Finally, from the root of the Gort repository, you can start Gort by using docker compose as follows:
docker compose up
If everything works as intended, you will now be running three containers:
Gort
Postgres (a database, to store user and bundle data)
Jaeger (for storing trace telemetry)
2.5. Bootstrapping Gort
Additional reading: :doc:`bootstrapping`
Before you can use Gort, you have to bootstrap it by creating the admin user.
You can do this using the gort bootstrap command and passing it the email address that your Slack provider knows you by, and the URL of the Gort controller API (by default this will be https://localhost:4000):
$ gort bootstrap --allow-insecure https://localhost:4000
User "admin" created and credentials appended to gort config.
Because you haven’t installed any TLS/SSL certificates, Gort will generate and use its own. Normally the Gort client will reject self-signed certificates, but the --allow-insecure flag turns those safeguards off.
Obviously, do not use this feature in production!
## Using Gort
You should now be able to use Gort in any Slack channel that includes your Gort bot. Any Gort commands should be prepended by a !. For example, try typing the following in Slack:
!echo Hello, Gort!
If everything works as expected, you should see an output something like the following:
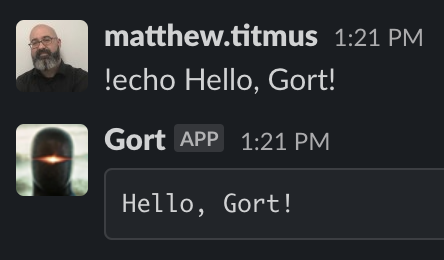
This instructs Gort to execute the echo command, which is part of the echo bundle. Alternatively, you could have specified the bundle as well by typing something like:
!echo:echo Hello, again, Gort!